Must See: Strong iPhone 13 sales helped Apple beat Xiaomi in Vietnam in Q4 2021
Once enabled, the dual-sim can be very useful as you can use one number for business and another number for personal calls, add a local data plan when you travel outside the country without the need to switch SIM card modules, and last but not the least, subscribe for two separate voice and data plans.
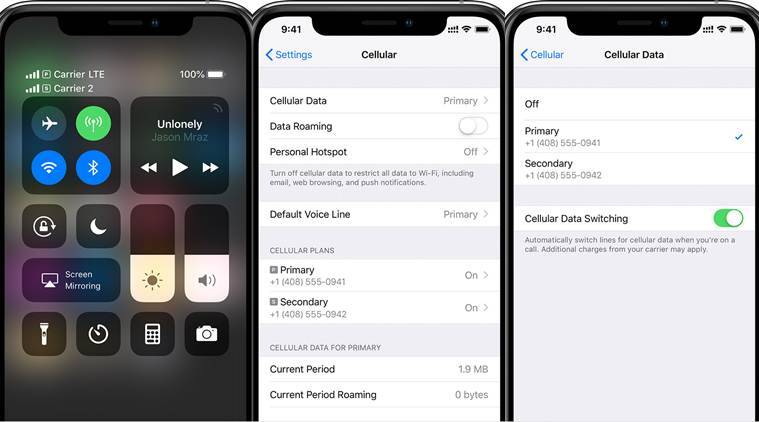
Steps to enable cellular plan with eSIM
On iPhone 13 series you can use two eSIMs for two or more cellular plans (only two active at a time) or a physical nano-SIM for a cellular plan and an eSIM for one or more other cellular plans.
Manual Way – Add a new eSIM on iPhone 13
You may manually enter your plan information to activate a new eSIM.
To enter your plan information manually, follow these steps:
- Head over to Settings.
- Tap the option for Cellular or Mobile Data.
- Then, tap Add Cellular Plan option.
- Finally, tap Enter Details Manually, at the bottom of your iPhone 13 display.
As mentioned earlier, you may store multiple eSIMs in your iPhone, but you can only use one at a time. But if you have multiple eSIMs entered on your phone, you can easily switch between two or more eSIMs.
For that:
- Tap Settings.
- Tap either Cellular or Mobile Data.
- And then tap the plan you want to use.
- Finally, tap Turn On This Line.
Label for easy identification
Once the second plan is activated, label your plans for easy identification. For instance, you may label one plan a Personal/Home and the other plan Business or any custom labels.
You’ll use these labels when you choose which phone number to use for making or receiving calls and messages, to designate a number for cellular data, and to assign a number to your contacts.
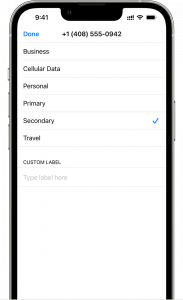
Labels are changeable and in the future, if you need to change the assigned labels, then you can go to Settings, tap either Cellular or Mobile Data, and then tap the number whose label you want to change. Then tap Cellular Plan Label and select a new label or enter a custom label.
Another thing you can do is to select a number to use as default when you call or push a text message to anyone, not in your Contacts. With iOS 13 or later, you can also select which cellular plans you want to use for iMessage and FaceTime. Fortunately, iOS 13 and later OSes allow you to choose either or both numbers.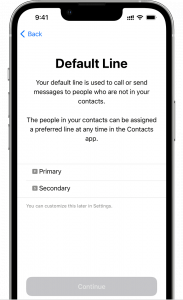
On this screen, choose a number to be your default, or you can choose which number is to be used only for cellular data. Your other number will be your default. Allow Cellular Data Switching option enables your iPhone 13 to use cellular data from both plans, depending on coverage and availability.
We’d recommend you to turn it on!
So this is pretty much how you can use Dual SIMs on iPhones. Apple has been reluctant to provide Dual SIM slots for ages and thanks to the introduction of eSIMs, the latest Apple iPhone users can enjoy having two SIMs at a time.

