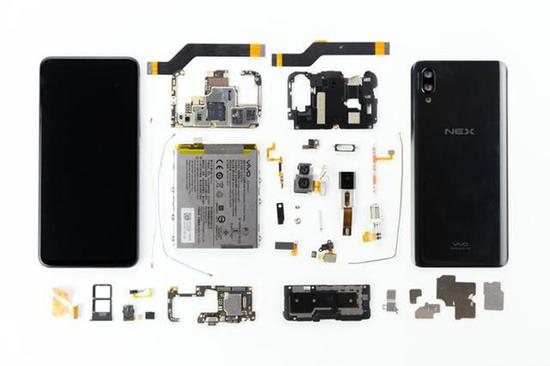
Vivo NEX that not only include flagship specs like Snapdragon 845, high screen-to-body ratio display, in-screen fingerprint scanner and more has gained a lot popularity for its innovative design and features. A Chinese publication has disassembled the Vivo NEX smartphone to reveal its complex and sophisticated construction.
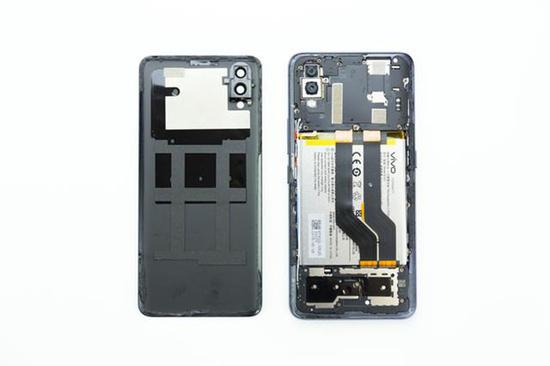
The disassembly begins with the removal of the SIM card tray. The backside of the phone is made out of glass which can be removed after treating it with heat by means of a hair dryer. After ten minutes of carefully heating the back glass, it can be slowly sucked up by using a suction cup. A crowbar is also required to cut the double-sided tape after which the back cover comes off easily. Following image shows how does the Vivo NEX appear after removing its back cover.
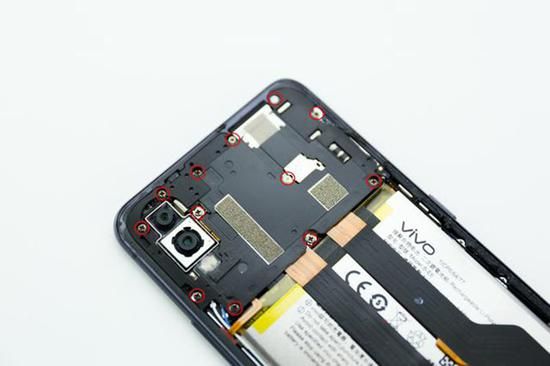
The motherboard and tail plug are connected by using two cables. There is a graphite heat sink for heat dissipation. There is a protective cover on the motherboard for securing and for protecting other components. After removing the screws, the protective cover can be taken off with ease. The space of the motherboard is compressed because of the dual camera setup and the motorized front camera module.
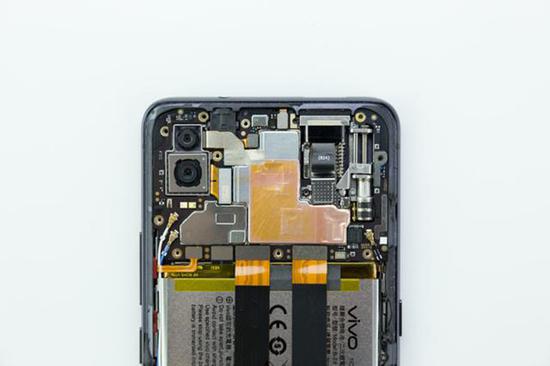
The device is required to be turned off in order to separate the cables connected to the motherboard. First, the left and right button cables are removed and then the two tail plug cables can be disconnected to separate the motherboard. The next step involves disconnecting the cables that are connected to the dual rear camera, headphone jack and sensors.
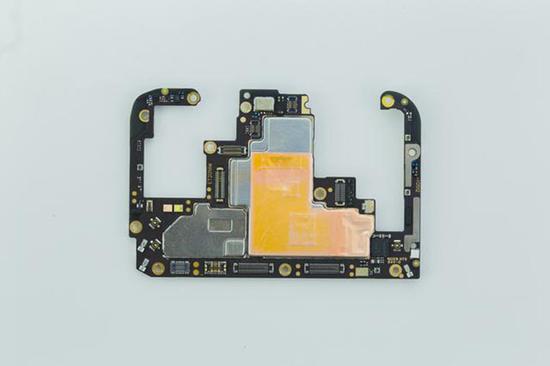
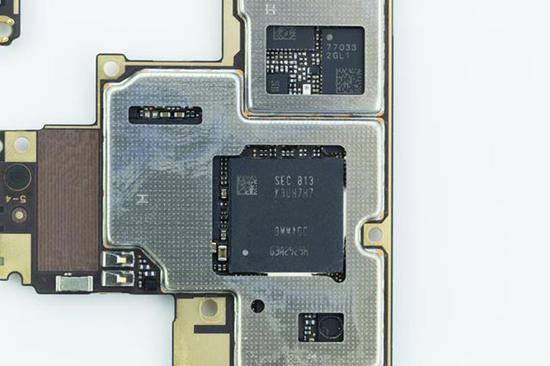
There is a mother-screw that the connects the front camera module to the motherboard. After lifting up and removing the front camera with a crowbar, the motherboard can be taken out. Following image is of the motherboard that looks like a mountain. There are very few exposed components on it.
Most of the area of the motherboard is covered with a shield and there is hardly any gap between the shields present on it. Below the main shield is the Qualcomm Snapdragon 845 SOC and 8 GB RAM that are housed in a a common package. Since it is a highly integrated motherboard, a local technician may not be able to fix it on their own if it malfunctions. The only solution is to contact the official after-sales service to fix problems that are associated with the motherboard.
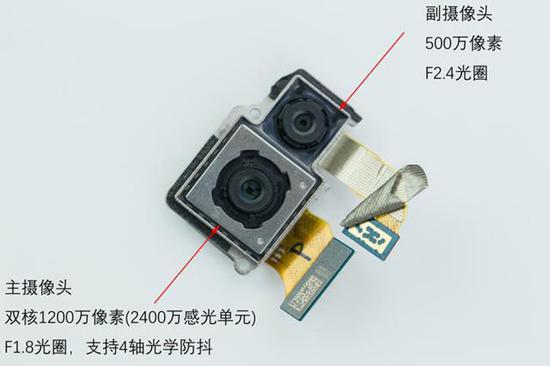
Only after removing the motherboard, the vertical dual camera can be de-seated using a crowbar. The main camera is of 12-megapixel with f/1.8 aperture and 4-axis optical image stabilization and the secondary camera is of 5-megapixel with f/2.4 aperture. The thickness of the main camera is less than the secondary camera. The main camera does not have a heat sink behind but a small piece of copper heat sink can be found underneath the secondary camera.
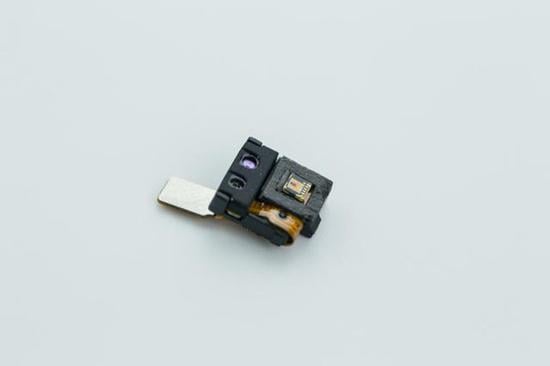
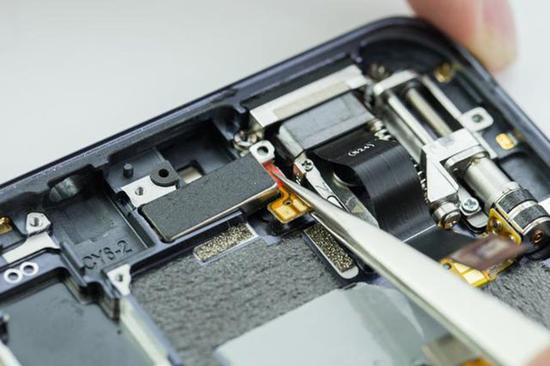
After removing the dual camera, the earphone hole can be ejected using a pry bar. The earphone hole is guarded by a rubber pad to prevent water from flowing inside. The sensor module that includes sensors like ambient sensor and proximity sensor can be removed using a tweezer.
If there is something wrong with one of the sensors, the entire sensor module must be replaced. After the sensor module is only accessible after removing the motherboard. The portion of the AMOLED screen corresponding the sensor module is transparent.
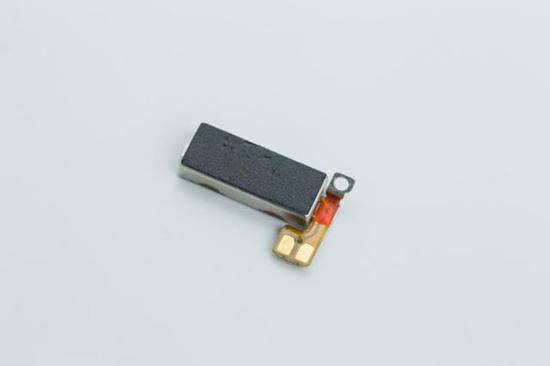
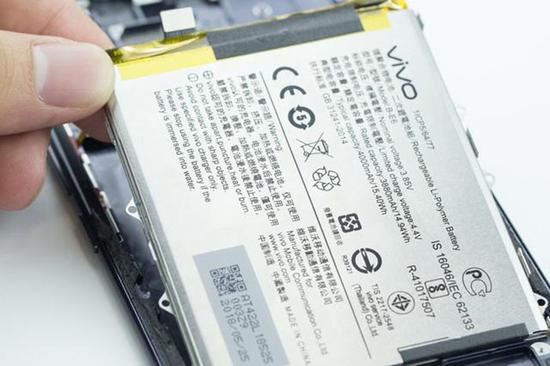
Next is the linear vibrator that can be removed using a tweezer. It functions as the earphone of the Vivo NEX and the sound emitted from it can be heard through the display. In order to remove the battery, the upper tail cable has to be disconnected and the 6 screws present on the left and right sides needs to be unscrewed. The ALT supplied 4,000mAh battery that supports 22.5W flash charging can be then removed.
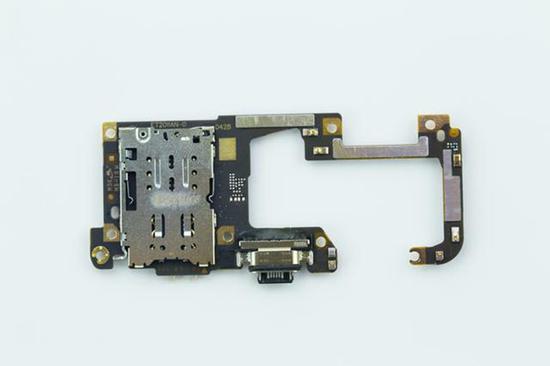
After removing the tail plugs cables, coaxial lines, the screen cable can be lifted. Among the two tail plug cables, the first one is for motherboard which is responsible for transmitting data and power. The other one is responsible for the screen cable which is responsible for transmitting display and touch data.
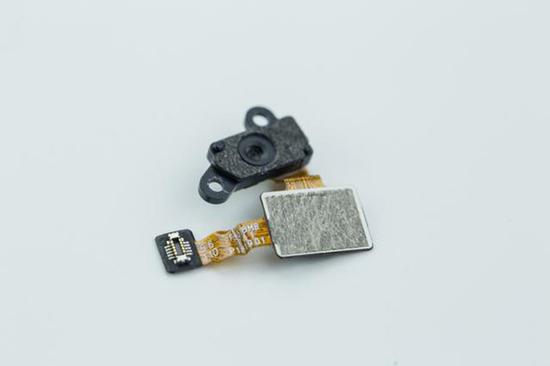
The shape of the tail plug is also irregular, and the microSD card slot is also placed on it. A vibration motor is placed underneath the tail plug which can be taken out using a tweezer. Next comes the fingerprint module that is secured with two screws. After removing the screens, the fingerprint sensor can be removed gently through a tweezer.
Vivo is using third-generation in-screen fingerprint module which appears like camera. It looks very different from the predecessor fingerprint module that looked like a chip. The AMOLED screen is transparent at the portion where the fingerprint scanner is placed.
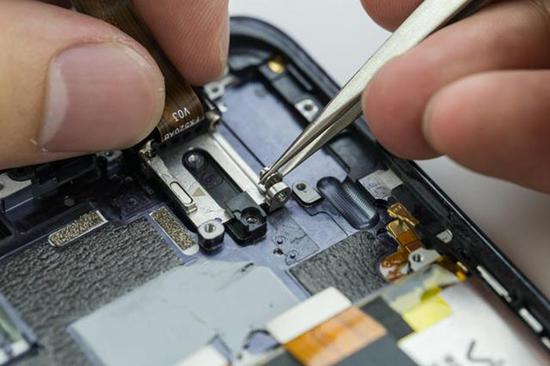
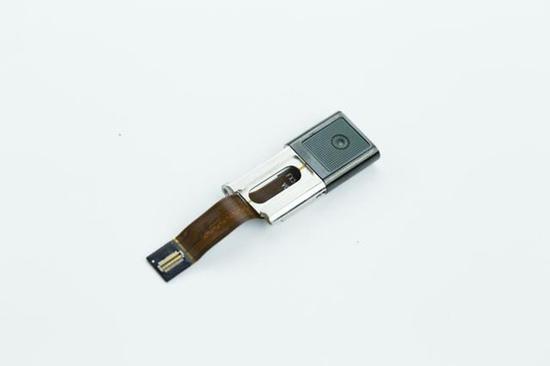
The most complex step of disassembling the Vivo NEX is the removal of the front camera module as it features many small parts and screws. The springs act as a cushion and the spiral stepper motor present on the right side is responsible for propelling the camera upwards. After removing the motorized assembly, the front camera can be pulled out from the top. The front camera is fully packaged which means if it encounters any problem, it should be replaced through the official after-sales service.
The OLED screen of the Vivo NEX and the mid-frame are glued together. If the applied heating is not sufficient, the display can crack. When a new screen has be installed on the phone, too much pressure should not be applied when it is attached to the mid-frame. Hence, it is advisable to contact Vivo’s after-sales service to fix a cracked display.
The Vivo NEX teardown reveals the different new technologies that the company has applied on the construction of the smartphone. The publication claims it took 3 hours to completely disassemble the Vivo NEX. The internal arrangement of the components is complicated, and the company has used good quality parts on the phone.
Visit the source link for more images and detailed information.
(source)


