Poco F1 is one of the best budget flagships Xiaomi has ever made. It comes with all the features that you want in a high-end smartphone sans some negligible shortcomings. If you own a Poco F1 and to unlock the full potential of the phone, you might want to root it. Thus, here in this article, we will guide you step by step on how to root Poco F1.
Last year, out of the blue, Xiaomi formed a sub-brand named Poco focussing on budget flagship smartphones. The first phone which is Poco F1 or Pocophone F1 became popular in a short period and for a good reason. The phone features the top of the line Qualcomm Snapdragon 845 processor with Adreno 630 GPU coupled with either 6 or 8 GB of RAM. It comes in three storage variants – 6GB RAM / 64GB ROM, 6GB RAM / 128GB ROM, and 8GB RAM / 256GB ROM. Additionally, it also supports storage expansion up to 256GB via microSD card.

Though the body of Poco F1 is made of polycarbonate (plastic), it is strong enough to withhold accidental drops, and therefore it is much better than the fragile glass back we seen on premium smartphones these days. As far as cameras are concerned, the phone features a dual camera array at the back which consists of a 12MP primary sensor with f/1.9 aperture and a 5MP depth sensor. The camera specification might seem outdated as all OEMs including Xiaomi have moved to triple or more cameras now. But the pictures taken on Poco F1 are still better than the phones available in the same price segment.
The only downside which we could think of Poco F1 would be its 6.18 inches FHD+ (1080 x 2246 pixels) IPS LCD with a wide notch. However, it makes up that by including an infrared face recognition system in that notch along with a 20MP selfie camera with f/2.0 aperture. The phone also comes with all the necessary sensors such as fingerprint, proximity, accelerometer, gyro, and compass. The connectivity features of the phone include LTE, WiFi 6, Bluetooth 5.0, GPS, USB type-C, and headphone jack.
On the software front, the Poco F1 launched with MIUI 10 based on Android Oreo and was later updated to Android Pie. The phone is also expected to get Android Q as confirmed by the company itself. Last but not least, it consumes power from a non-removable 4,000 mAh battery with support for 18W fast charging.
Related: Xiaomi Poco F1 MIUI 10.3.4 update brings Widevine L1, 4K 60fps video recording, Game Turbo and more
Since we are done with the introduction of Poco F1, let us go through our step by step guide on how to root it. Make sure to follow each step carefully to avoid any error. Before proceeding, we would recommend you to take a backup of your important files stored on your phone to avoid data loss if anything goes wrong.
Prerequisites for rooting the Poco F1
- Poco F1 with bootloader unlocked
- Windows PC / Laptop
- ADB and Fastboot drivers
- Xiaomi USB Drivers
- USB cable
- Download Custom Recovery (TWRP 3.2.3 preferable)
- Download Magisk – Systemless Root
- Forced Encryption Disabler: Disable-Force-Encryption-Treble.zip
If you haven’t unlocked the bootloader of your Poco F1 yet, then consider doing it first as the phone cannot be rooted with a locked bootloader.
Steps to Install TWRP Recovery on Poco F1:
- Enable USB Debugging on your Poco F1, found under ‘Developer options.’
- Download the official TWRP img file for Poco F1 and Magisk zip file.
- Copy the TWRP img file to the ADB and Fastboot directory on your Windows PC / Laptop. Whereas, copy the Magisk zip file to your phone.
- Connect your phone to your Windows machine via USB cable.
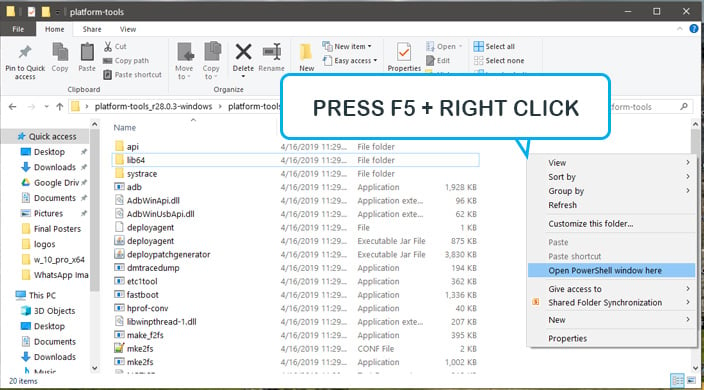
- Open command prompt in the ADB and Fastboot directory by typing cmd in the address bar located at the top.

- Execute the following commands to flash the official TWRP on your Poco F1:
adb reboot bootloader
- Flash TWRP recovery by running the command below:
fastboot flash recovery twrp-3.2.3.0-beryllium-20180831.img
- Then, execute the following command:
fastboot boot twrp-3.2.3.0-beryllium-20180831.img
You have successfully installed the TWRP custom recovery on Xiaomi Poco F1.
Steps to Root Poco F1
To gain root access, follow the steps below to flash Magisk Module to learn the root access.
- After executing the above command, you will automatically boot into TWRP recovery.
- Tap on ‘Install‘ and select the ‘Disable-Force-Encryption-Treble.zip‘ file. Then swipe to confirm the installation.
- In the recovery, go to ‘Install’ and select the Magisk zip file to install on your phone.
- After the installation of Magisk, reboot your phone by navigating to Reboot -> System.
- That is it, and you have successfully rooted your Poco F1. If you are facing any error or difficulty, then do mention them in the comment section below. We will try our best to help you as soon as possible.


